Центрифуга с корзиной для извлечения конопляного масла PBZ400P
US $9900-$10900

Поделиться:
Centrifuge installation and requirements
![]() Warning
Warning
Do not install the machine near flammable and explosive materials. Before the instrument is powered on, manually open the centrifuge door to inspect the centrifuge chamber; do not turn on the power before taking out the contents in the centrifuge chamber.

Installation Environment:
1.Ambient temperature and humidity: The surrounding environment has a certain impact on the life and performance of the centrifuge. It is best to work in the allowable ambient temperature range (10℃~35℃), and the relative humidity is less than 80%.
2.It is required that there is no experimental equipment that generates a large heat source and a strong vibration source nearby.
3.Avoid installing in direct sunlight and humid places.
4.Avoid installation in places with corrosive, flammable, and explosive gases in the air.
5.Avoid installation in places with oily, dusty, and metal dust.
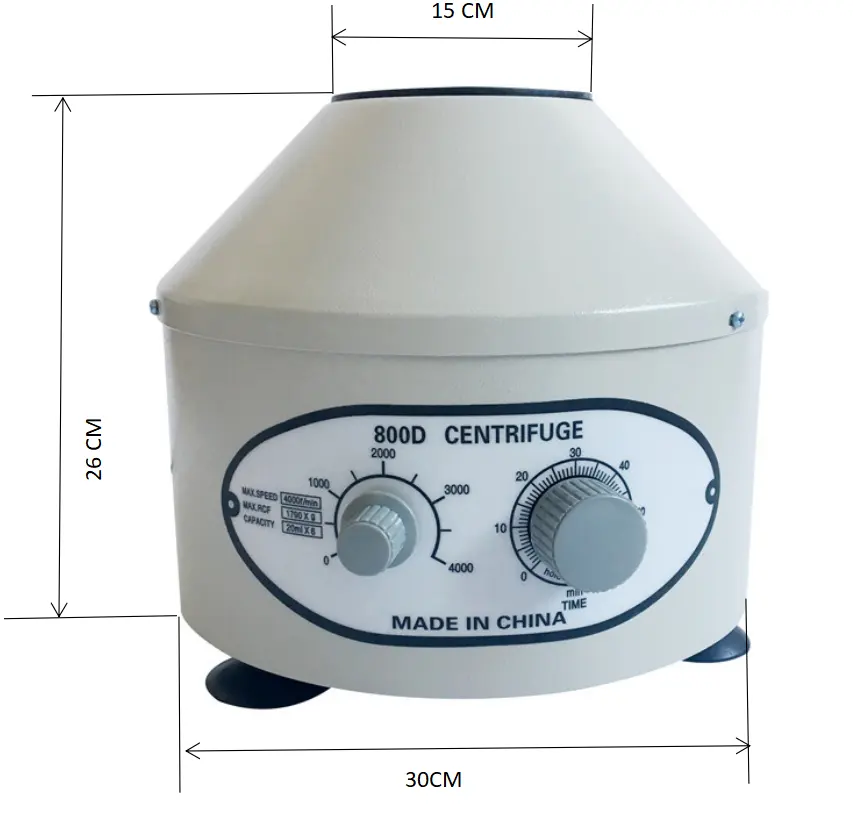
| Model specification | MM10 |
| Maximum speed | 4000r/min |
| Maximum centrifugal acceleration | 1980×g |
| Maximum capacity | 8×15ml |
| Speed control accuracy | ±20r/min |
| Time setting range | 1~99min |
| power supply | AC220×(1±10%)V 50/60±1Hz <2A |
| Machine noise | < 62dB(A) |
| Dimensions (L×W×H) | 322mm×452mm×268mm |
| Weight | 11Kg |


Installation steps:
1. When you receive the goods, please check whether the appearance of the packing box is intact. If there is any damage, please negotiate with the freight forwarder and notify the company.
2. Open the outer packaging, carefully take out the centrifuge (along with the foam packaging), place it on a level and solid table, remove the foam packaging, and make the four legs of the centrifuge evenly contact the table.
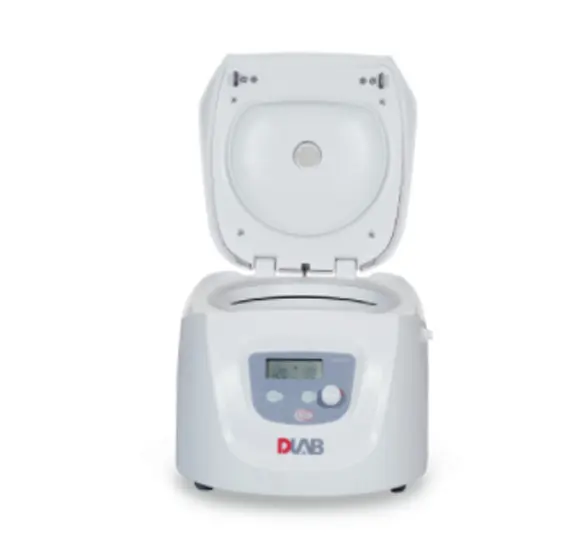
3. Open the door cover: open the door cover by hand by pressing the door open button on the right side of the centrifuge (the door opening position can be seen in the host diagram); check the centrifuge room, take out the contents in the centrifuge room, and clean the centrifuge room.
4. Check the packing list: check whether the host, accessories, random tools, and random files are complete and correct.
5. Rotor installation: Take the rotor out of the packing box, carefully check whether the rotor is damaged or deformed during transportation, hold the rotor body with both hands, place the rotor vertically and steadily on the rotor seat, and then tighten the matching fixing with a Phillips screwdriver Rotor screw.
6. Confirm that the power supply voltage is consistent with the required voltage of the machine, connect the plug end of the power cord equipped with the machine to the socket on the centrifuge first, then insert the plug at the other end of the power cord into the external power socket, and switch the power on the back of the centrifuge Press one end marked "" to turn on the power.